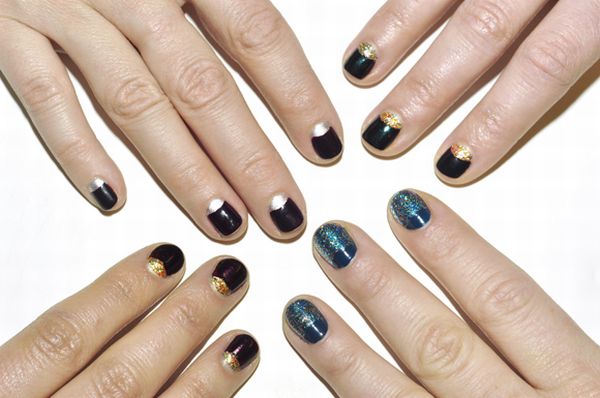
Who would not like to have pretty nails? Finely manicured nails are the easiest way to pamper yourself and lift up your mood. Half moon manicures are in vogue right now, so why not learn how to do them yourself! Half moon manicures are vintage art manicures. Basically, in half moon manicures, two tones of nail color on the nail in such a fashion that the base color looks like a half moon. Half moon manicures were popular in the 1920’s-40’s era. They resurfaced in spring 2011 runway trends. Follow these simple steps to get them on your nails.
Complexity Level Moderately Easy
Time Required 30 minutes
Resources Required
1. Two nail colors
2. 5 / 10 paper hole reinforcement stickers.
3. Top nail coat
Instructions
Step 1
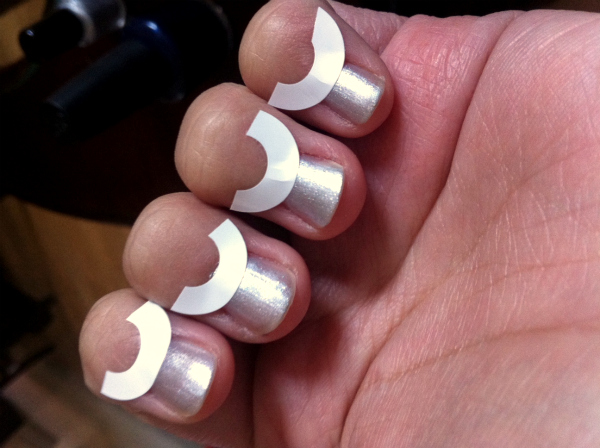
Choose what color you want your moon to be and apply that as the base color. Allow it to dry and apply one more coat if need be. Once your base color has completely dried, you can begin with making the half moons.
Step 2
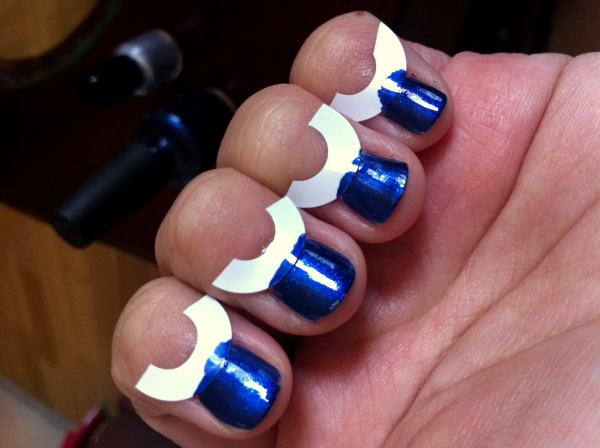
If you have a steady hand and are confident enough, you can give the reinforcement stickers a miss. If this is your first time, you might want to use the stickers. You can either take five of these stickers and cut them into halves to suffice the need for all fingers, or use ten stickers without splitting them. Now, carefully place these stickers around the moon area of your nail.
Step 3
Once the stickers are in place, paint the rest of your nail with other color. You might want to paint over the stickers and around the edges just so that the edges of the moon come out clear.
Step 4
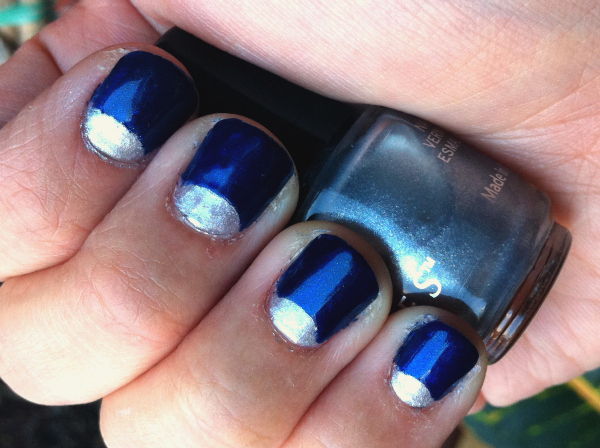
Now is the time to take a few pictures and admire your nails till they dry up. You can apply another coat if you feel so. Sometimes, the base color is still visible and another coat is required. Once your nail is completely dry, you can remove the sticker.
Step 5
Lastly, apply a top coat to your entire nail if you think it’s required and let it dry.
Frequently asked questions
Q. How do I make my style different?
A. You can go for a transparent base color instead of an opaque one. Or you can choose not to color it at all allowing the natural moon area of your nail to show itself. Also, you can directly stick the reinforcement sticker onto your nail, paint the rest of the nail, remove the sticker and add some nail glitter to the empty moon area. This will make your half moon stand out and look pretty! The glitter method is a good option when you are going clubbing.
Quick tips
- Experiment with different nail shapes. Round nail shapes is not a rule for half moon manicures.
- Stick the reinforcement sticker carefully, keeping in mind its stickiness or you might run the risk of peeling the base color off when you’re removing the sticker.
- For a clean half moon look, apply the sticker a little above so that the inside hole touches the bottom of your cuticles.
Thing to watch out for
At each step, make sure your nails are completely dry before proceeding to the next step.


